I love harvesting and processing herbs for my remedies and the article below is full of useful tips and instructions to help you process your own herbs.
Enjoy! ~*~
There is nothing more satisfying than growing, storing, and using your own medicinal herbs. Using the tools nature gives us to protect our health and loved ones’ feels right to me. So, I enjoy the time spent learning about herbs, gathering them, and preserving them for future use.
Gathering Herbs For Medicinal Use
Where and how you gather your herbs is extremely important. The first concern is that you are 100% certain of your plant identification before you harvest it. Using the wrong herb could be life-threatening, so make sure you know the herb well before using it.
Next, you must be careful of where you gather or grow your herbs. Your backyard herb garden is hopefully safe from all toxins, pesticides, and herbicides. But the same cannot be said when gathering in the wild. Choose natural sites, far away from traffic and dump sites. Car exhaust, herbicides sprayed to control weeds, and other pollutants can contaminate herbs grown along the roadside. Likewise, old industrial sites or dump sites are not suitable because of potential toxins.
Drying Your Medicinal Herbs
Once you’ve harvested your herbs from a clean site, you want to process them immediately to protect their potency until you are ready to use them. If you are not using your herbs fresh, drying them is an excellent option for preserving them. Drying or dehydrating can be done in several different ways.
Method 1: Use A Dehydrator
I prefer to use a dehydrator to dry my herbs. By using a dehydrator, I can control the drying process and optimize the drying time. A steady stream of warm, dry air quickly dries my herbs before they have a chance to degrade. Here is the process:
Preheat your dehydrator. Set the thermostat for a drying temperature of 95 to 115 degrees Fahrenheit. I prefer to use the lowest temperature, but if it is a very humid day, the higher temperature may be needed.
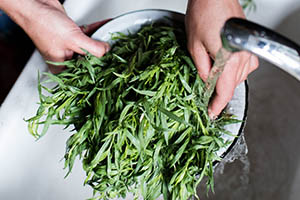
 Clean your herbs and blot them dry with a towel to remove any surface moisture.
- Remove large leaves for drying separately. Small leaves can remain on the stem, if desired.
- Place the herbs on a dehydrator tray in a single layer and label the tray if you are doing more than one herb at a time.
- If you are drying roots, wash them and scrub off any dirt. Pat dry and cut into small, thin pieces.
- Dry the herbs for 2 to 8 hours or longer, until the leaves are crumbly, crisp, and completely dry. Larger leaves and stems usually take longer than fine small leaves, so check them periodically and remove them when dry. Allow the herbs to cool before storing.
Air Drying Medicinal Herbs
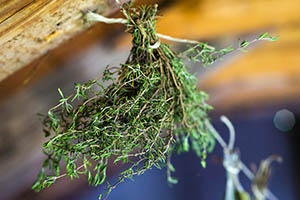
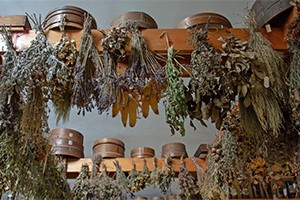
Air drying is another method of drying herbs that works well in dry climates. You need a warm, shady spot with good ventilation. You don’t want them in the sun because the intense heat and sun can quickly degrade the herbs.
1.  Gather the herbs into small bundles and bind them at one end with a small rubber band. Hang them upside down in an out of the way spot, until they are completely dry.
Some people hang them in the kitchen window, but I recommend choosing a spot out of direct sunlight. Before I got my dehydrator, I would hang them on one end of my pot rack, but any warm, well-ventilated spot will work.
2.  If the herbs contain seeds or tiny leaves that might release when dry; place the herb bundle in a small paper bag to catch the seeds or leaves.
3. Another possibility is to place them on an oven rack or elevated screen on a countertop. Make sure that air can flow freely under and around each sprig.
4. Air drying herbs takes longer, usually several days. Check them daily and turn them as needed to allow them to dry evenly. Make sure they are completely dry before storing.
Oven Drying And Microwave Drying
I don’t recommend oven drying or microwave drying because the herbs can easily get too hot and lose their medicinal qualities. Why go to all the work to gather, dry, and store herbs, if they are no longer potent enough to be of use? If you do choose to use an oven or microwave, use the lowest possible settings and take them out as quickly as possible.
Processing And Storing Your Dried Herbs
Once your herbs are dry, it is time to sort them and prepare them for long term storage. This process is called garbling. Follow these steps to get your dried herbs ready to store:
 Place your herbs into a plastic bag or glass jar for a day, before moving them to long term storage. If you see any condensation on the bag or jar, they need to dry longer.
- Separate the leaves, flowers, stems, and roots, discarding unwanted parts. Each plant part has different uses; do the research on your plant to know which parts are most valuable.
- As you sort, test the dryness by breaking into the larger pieces of stem and root to make sure they are completely dry. If they bend or seem pliable at all, put them back to dry longer.
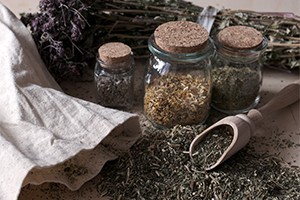
- Store your dried herbs in airtight containers away from heat and light. I like to use mason jars with a tight-fitting lid and store them in a dark cabinet.
- For best long-term storage, I place an oxygen absorber into the jar and vacuum seal it, however the herbs will keep for a year or more without it. If you live in a very humid environment, you may want to add a silica gel pack to the jar.
- Check the jars occasionally to make sure they are dry and have no mold growth. If properly stored, there should be no color change or bad smells. Throw them out if you detect any changes in quality.
- Use your herbs within two years for best potency. I prefer to harvest my medicinal herbs every year to make sure I always have a potent batch available.
Source: How To Properly Dry Plants for Medicine

Kathy is an herbalist/naturopathic practitioner who is constantly researching to expand her knowledge. She came to herbalism after her migraine medicine was suddenly removed from the market and she had to find something new. After discovering the magic of herbs she’s never looked back. She is accredited by the International Practitioners of Holistic Medicine (IPHM) and is an Associate Member of the American Herbalist Guild.